Navigating project files
Before we start
This tutorial is aimed at intermediate users who want to become more familiar with managing files in the RiskScape Platform. We expect that you:
Have gone through the Getting started guide and are familiar with the RiskScape Platform.
Have a Platform user account and have access to the Getting Started Platform project
Are comfortable using the file explorer on your computer.
This tutorial will walk you through the various ways of managing files on the RiskScape Platform. Important concepts will be explained as we go.
➡ Actions you need to do yourself will begin with an arrow, like this paragraph.
Platform project files
Each project in the RiskScape Platform has its own set of files associated with it. These files include:
the input data for the models
all the instructions that the RiskScape Engine needs to perform the analysis
other files that are supplementary to the model, such as documentation or licensing information
You could think of the files in the RiskScape Platform as a bit like a shared file system. If you are a member of a given project, then you can see the files associated with that project. If you are not a member of a given project, then you cannot see any files.
The files for a given project are called project storage. Only the project admin users for a given project can update the files in project storage. For other ‘member’ users in the project, the files will appear as read-only. This ensures only the expert modellers can change the fundamentals of how a risk model behaves.
There is a second ‘file system’ in the RiskScape Platform called personal storage. You are essentially the only person that can see your files in personal storage and update them.
Note
Any files uploaded to the RiskScape Platform will be stored in the cloud, regardless of whether the files are added to project storage or personal storage. The Platform architecture ensures that only authorized users can access the uploaded data.
For support, maintenance, and trouble-shooting purposes, select developers within the Catalyst organization will also be able to access data uploaded to the RiskScape Platform, however, these developers are bound by strict confidentially agreements.
Accessing files from your web browser
➡ Login to the RiskScape Platform and go to the Getting Started Platform project.
By default you will see all the models in this project, which should look like this:
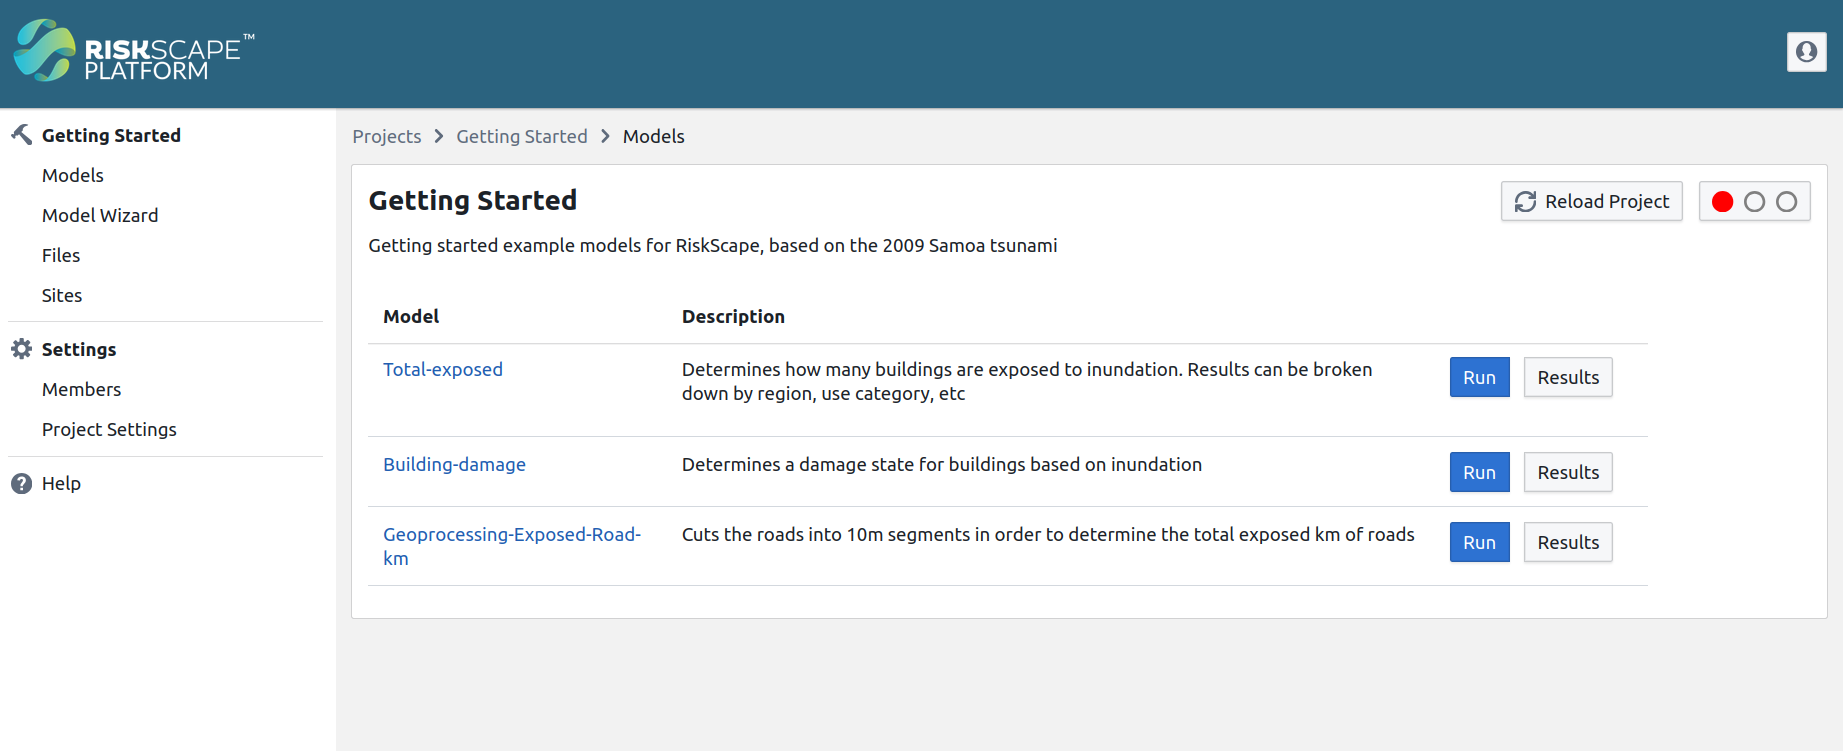
On the left-hand side, you will notice that the navigation panel contains links for Models and Files.
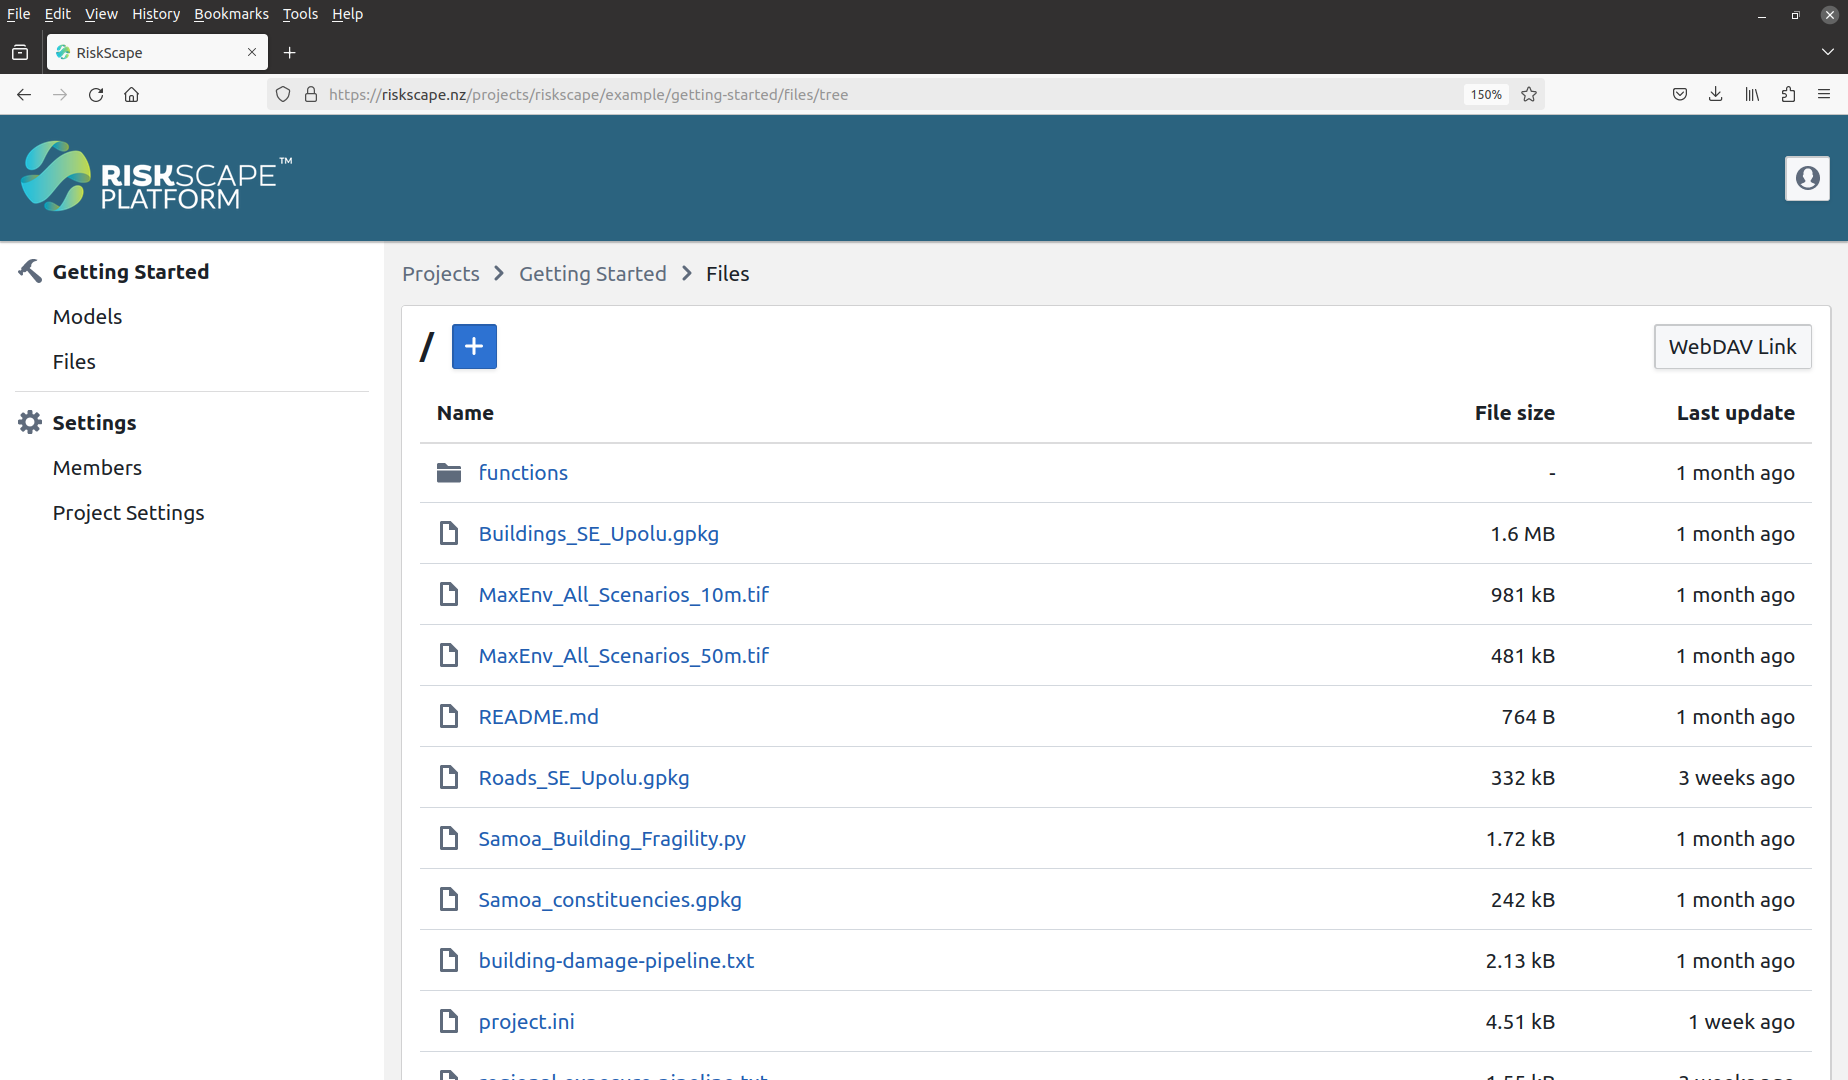
➡ Click on the ‘Files’ link. Alternatively, you can click this link to go directly there. You should see a page listing all the files in the project that looks like the following:
Tip
The ‘Models’ link will take you back to the models listing view for your project. The links in the left-hand panel are a handy way to navigate around a project in the RiskScape Platform.
The ‘Files’ page shows you all the files and directories that are in the ‘Getting Started’ project. Clicking on a directory will show you the files in that directory. Clicking on a file will show you more information about the file.
Viewing individual files
➡ Click on the README.md link in the list of files.
You should see a page that looks like the following:
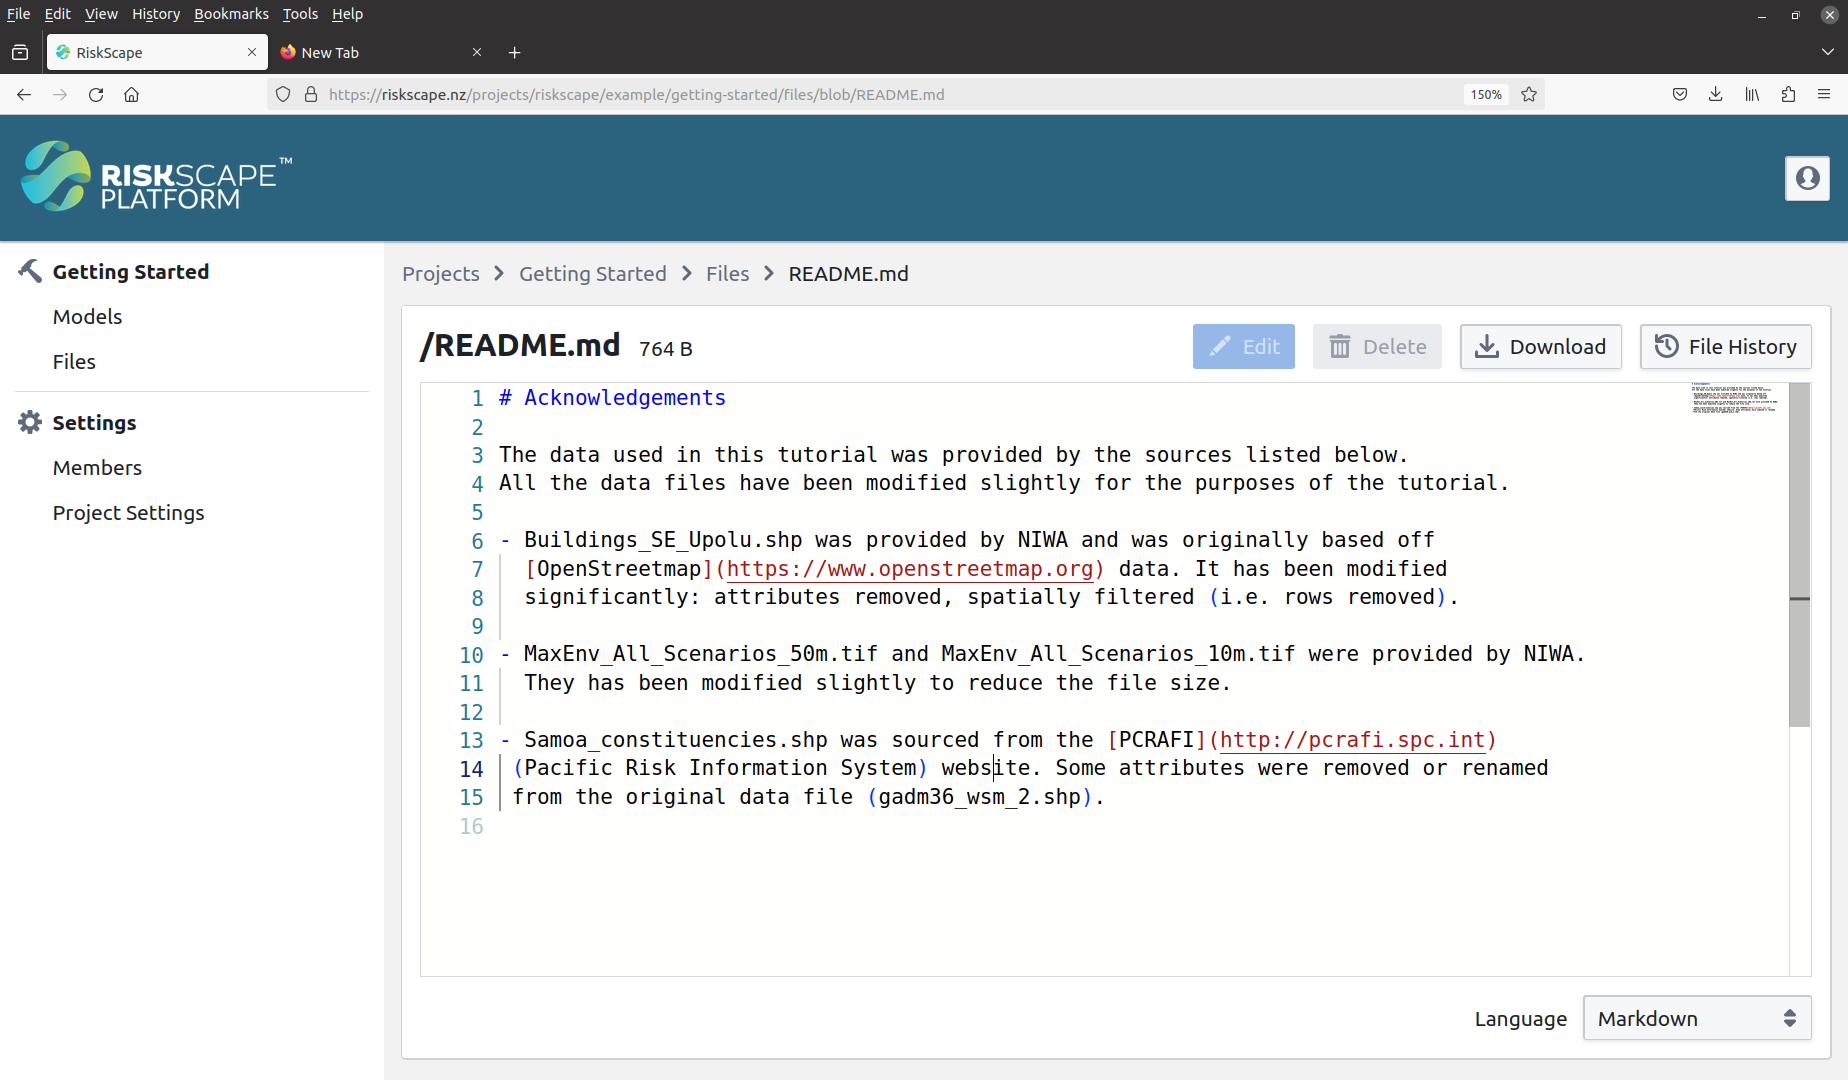
The README.md is a supplementary file that contains more information about the input files
that are used in this model, and where the data comes from.
The README.md file is not input data itself, nor is it instructions for the RiskScape Engine.
Above the README.md file’s content, there are some buttons:
Edit: update the content of plain-text files and save them. This option is a useful way to change the risk model (i.e. the instructions for the RiskScape Engine).
Delete: remove the file from the RiskScape Platform project storage.
Download: download a copy of the file to your computer. This is more useful for geospatial data, which you cannot view in the web browser.
File History: this shows you a history of the revisions made to this particular file. If you notice a sudden change in a model’s behaviour, the file history can be a useful way to determine what may have changed recently.
Note
Only the project admin users can make changes to the files in project storage. As you are only a member of the ‘Getting Started’ project, the Edit and Delete buttons are greyed out. This ensures that only expert users can fundamentally change how the risk model behaves. Users new to risk modelling in RiskScape cannot accidentally break the model or delete important files.
➡ Try clicking the ‘Download’ and ‘File History’ buttons for the README.md file and see what they do.
Tip
Above the file’s content, there are “breadcrumb” links, which let you go back to view the file listing for the project (i.e. the Files link), or for the sub-directory you are currently in. These breadcrumb links look like:
Projects > Getting Started > Files > README.md
➡ Click on the ‘Files’ breadcrumb link to go back to the file listing for the project. Alternatively, you can click this link to go directly there.
So far we have been looking at a plain-text file that can easily be viewed in our web browser. Now let’s try looking at the geospatial files that the model uses as input data.
➡ Click on the Samoa_constituencies.gpkg file to view more details about that.
You should see a page that looks like the following:
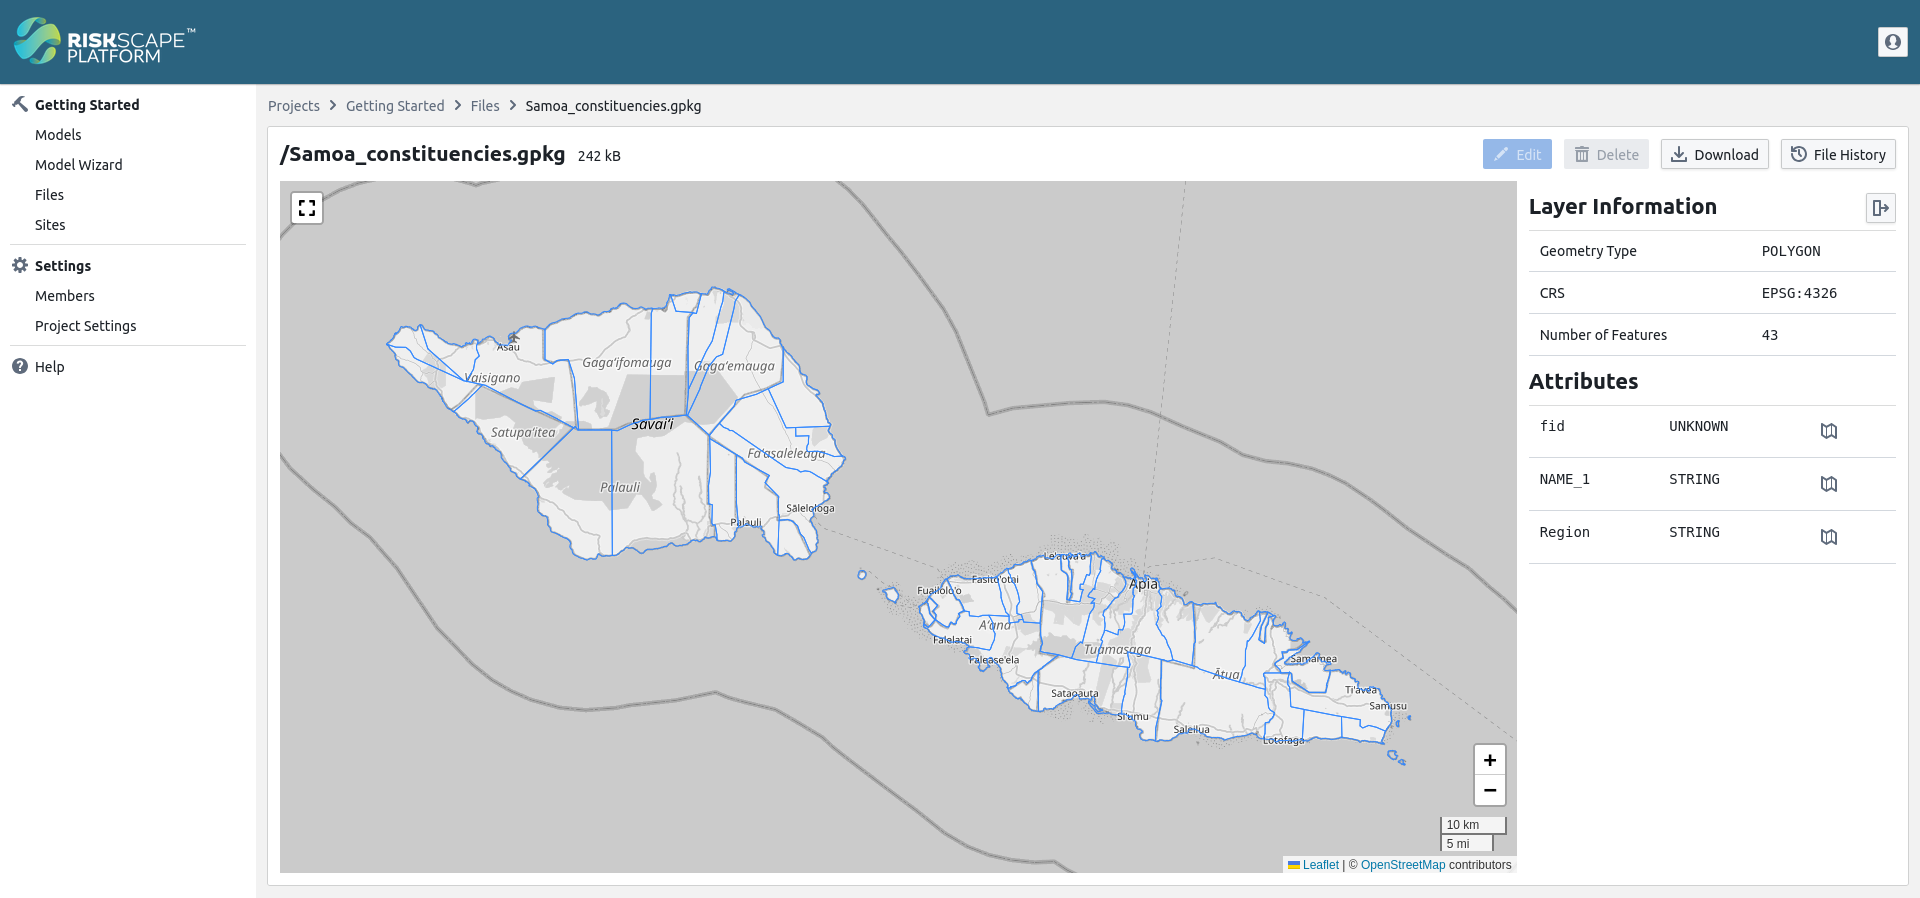
The RiskScape Platform will process geospatial files so they can be shown in your browser. This process may take some time for larger files. For more advanced analysis, you may still wish to download the file and open it in GIS software (e.g. QGIS) We will look at what exactly WebDAV is next.
Tip
The files that contain instructions for the RiskScape Engine are typically
INI files (e.g. project.ini), Python files (e.g. Samoa_Building_Fragility.py),
or pipeline .txt files (e.g. regional-exposure-pipeline.txt).
If you are comfortable using the CLI and want to learn more about these files, then the
Creating a RiskScape project
Engine tutorial is a good place to start.
WebDAV
WebDAV is a internet framework that is supported by most computers. It lets your computer connect to a web server, and view and modify remote files as if they existed locally on your own computer.
The main advantages of WebDAV are:
you can easily take a copy of the entire project, for example, if you wanted to run the models locally.
project admins can copy multiple files in one go. For example, if your project contains dozens of GeoTIFFs, it is much simpler to upload them via WebDAV, rather than uploading via the RiskScape Platform web browser interface one file at a time.
Tip
WebDAV is an optional method of accessing the project files in the RiskScape Platform. If you are not going to be a project admin user, and are comfortable simply using your web browser to view project files, then you can stop this tutorial here.
There are two things we need to connect to the RiskScape Platform via WebDAV:
The WebDAV URL for the project.
A WebDAV access token.
Note
Accessing RiskScape Platform storage via WebDAV access is only fully supported on Windows and Linux operating systems. Whilst MAC users should be able to view and access files via WebDAV, they will not be able to modify or save files.
WebDAV URL
➡ Navigate back to the ‘Files’ view for the Getting Started project. Alternatively, you can click this link to go directly there.
In the right, just above the file listing, there is a ‘WebDAV Link’ button. This displays the URL that you will use to access this project’s files via WebDAV.
➡ Click the ‘WebDAV Link’ and copy the URL that gets displayed. It should look like the following:
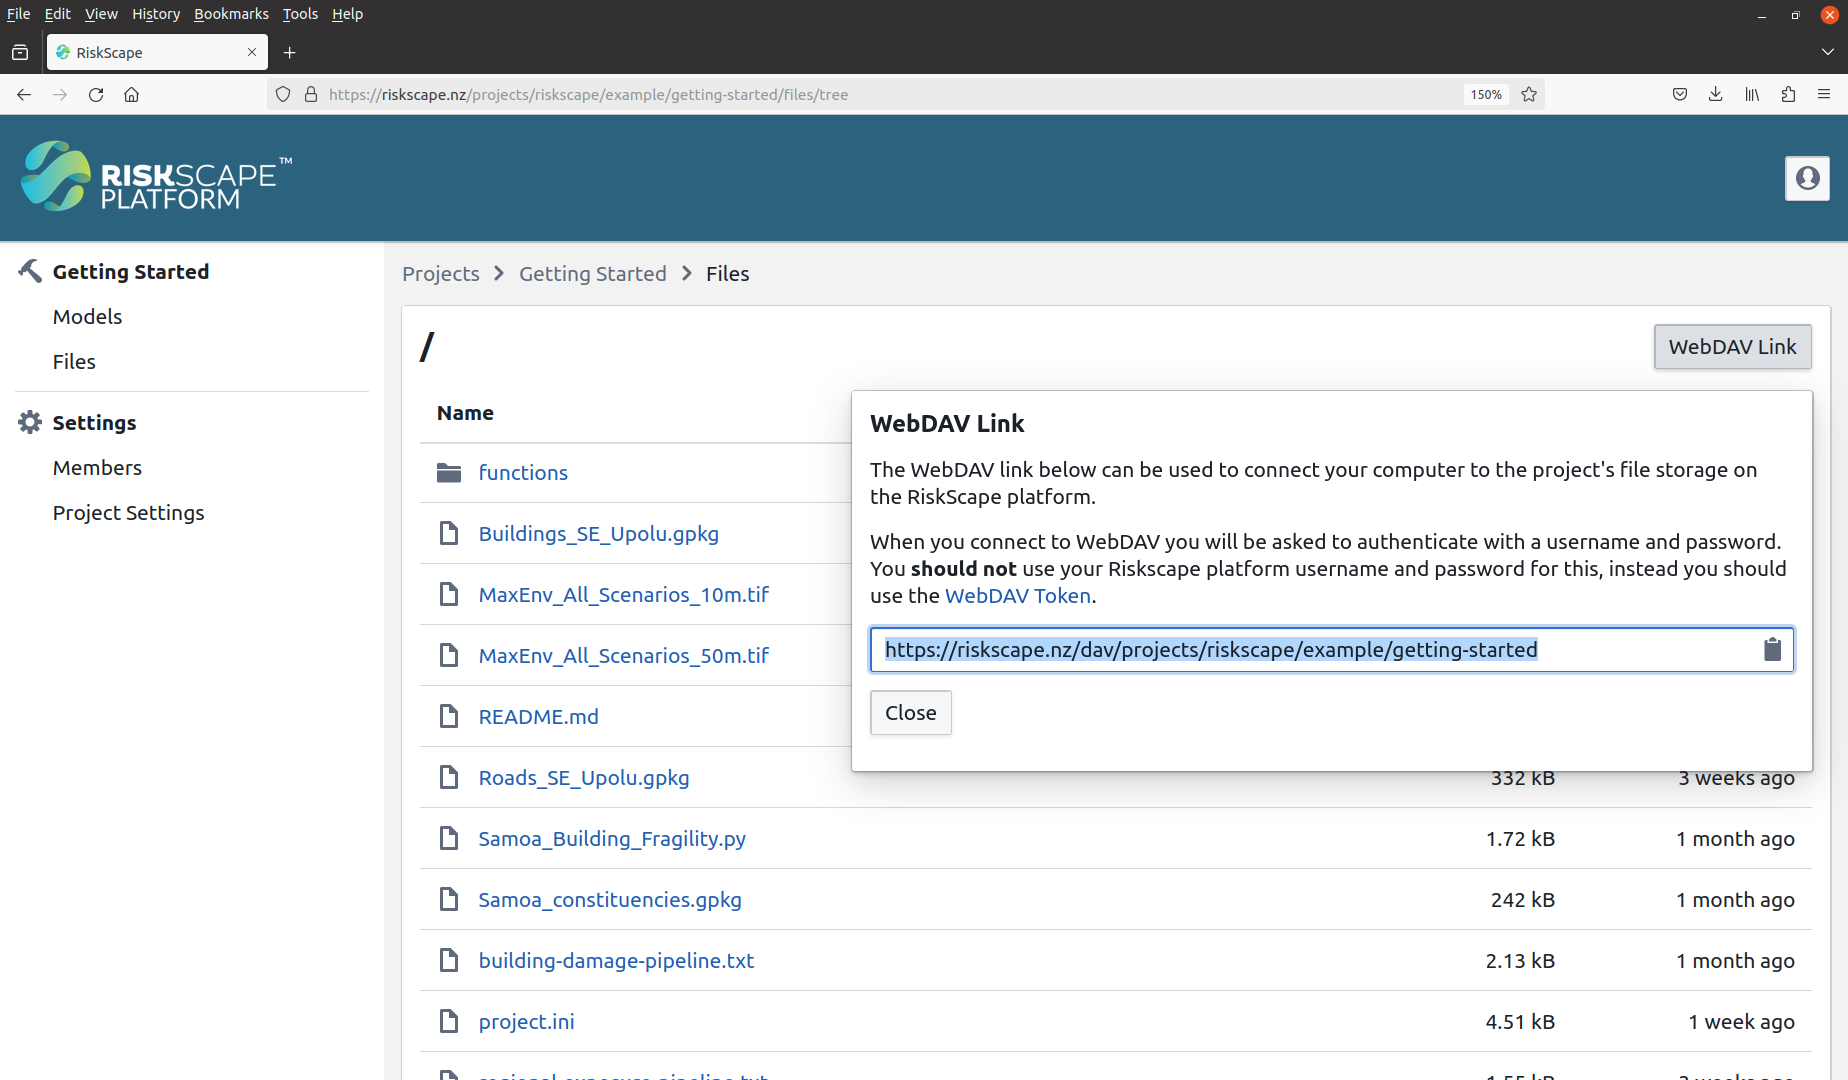
If you need to refer back to this URL later, it is:
https://riskscape.nz/dav/projects/riskscape/example/getting-started
WebDAV access token
Because only authorized users can view project files in the RiskScape Platform, we need a way of verifying our identity via WebDAV. This is called a WebDAV access token.
Tip
The WebDAV access token is a sensitive secret, and so it should be treated like a password. Any user who discovers your WebDAV access token will be able to view all the RiskScape Platform files that you have access to.
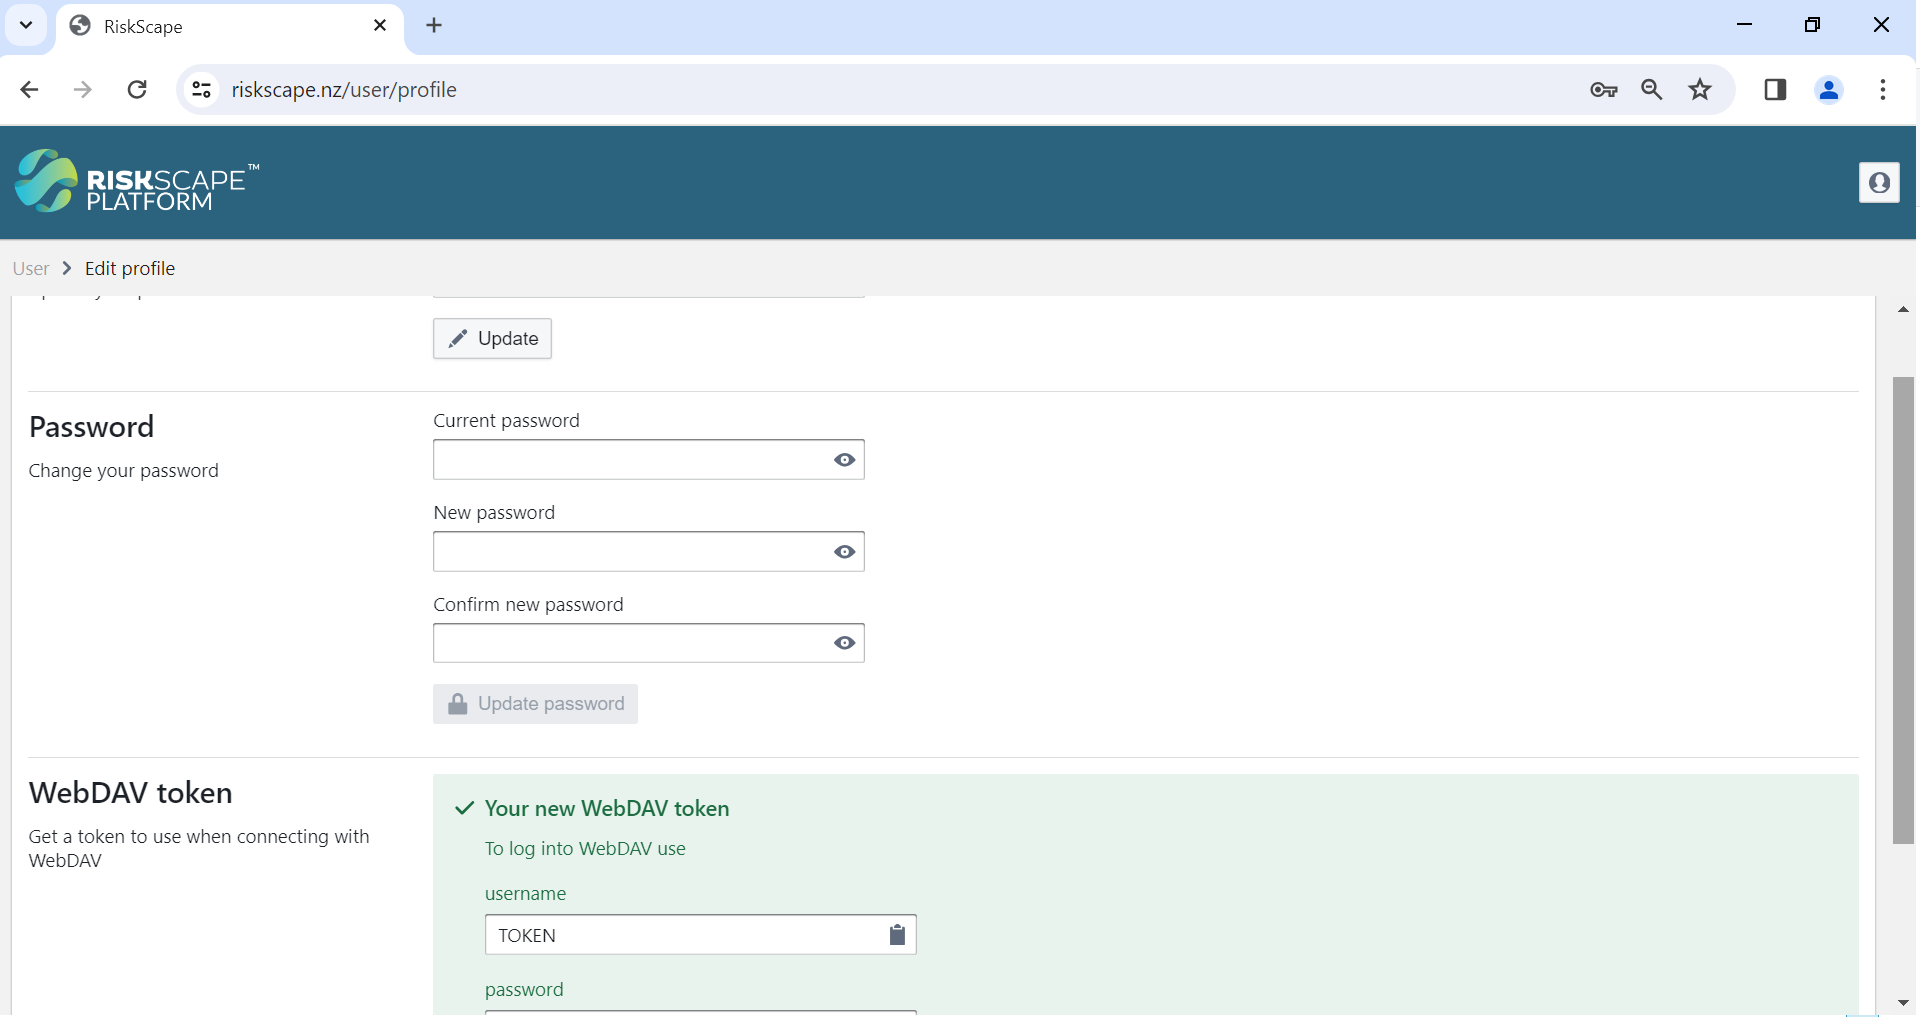
➡ Click the  icon in the top-right corner and select ‘Edit profile’.
Alternatively, you can click this link to go directly there.
➡ Scroll down and click the ‘Create new WebDAV access token’ button at the bottom of the page.
The image below shows you what this should look like.
Save the username (i.e. TOKEN) and password displayed in your password manager.
Connecting using WebDAV
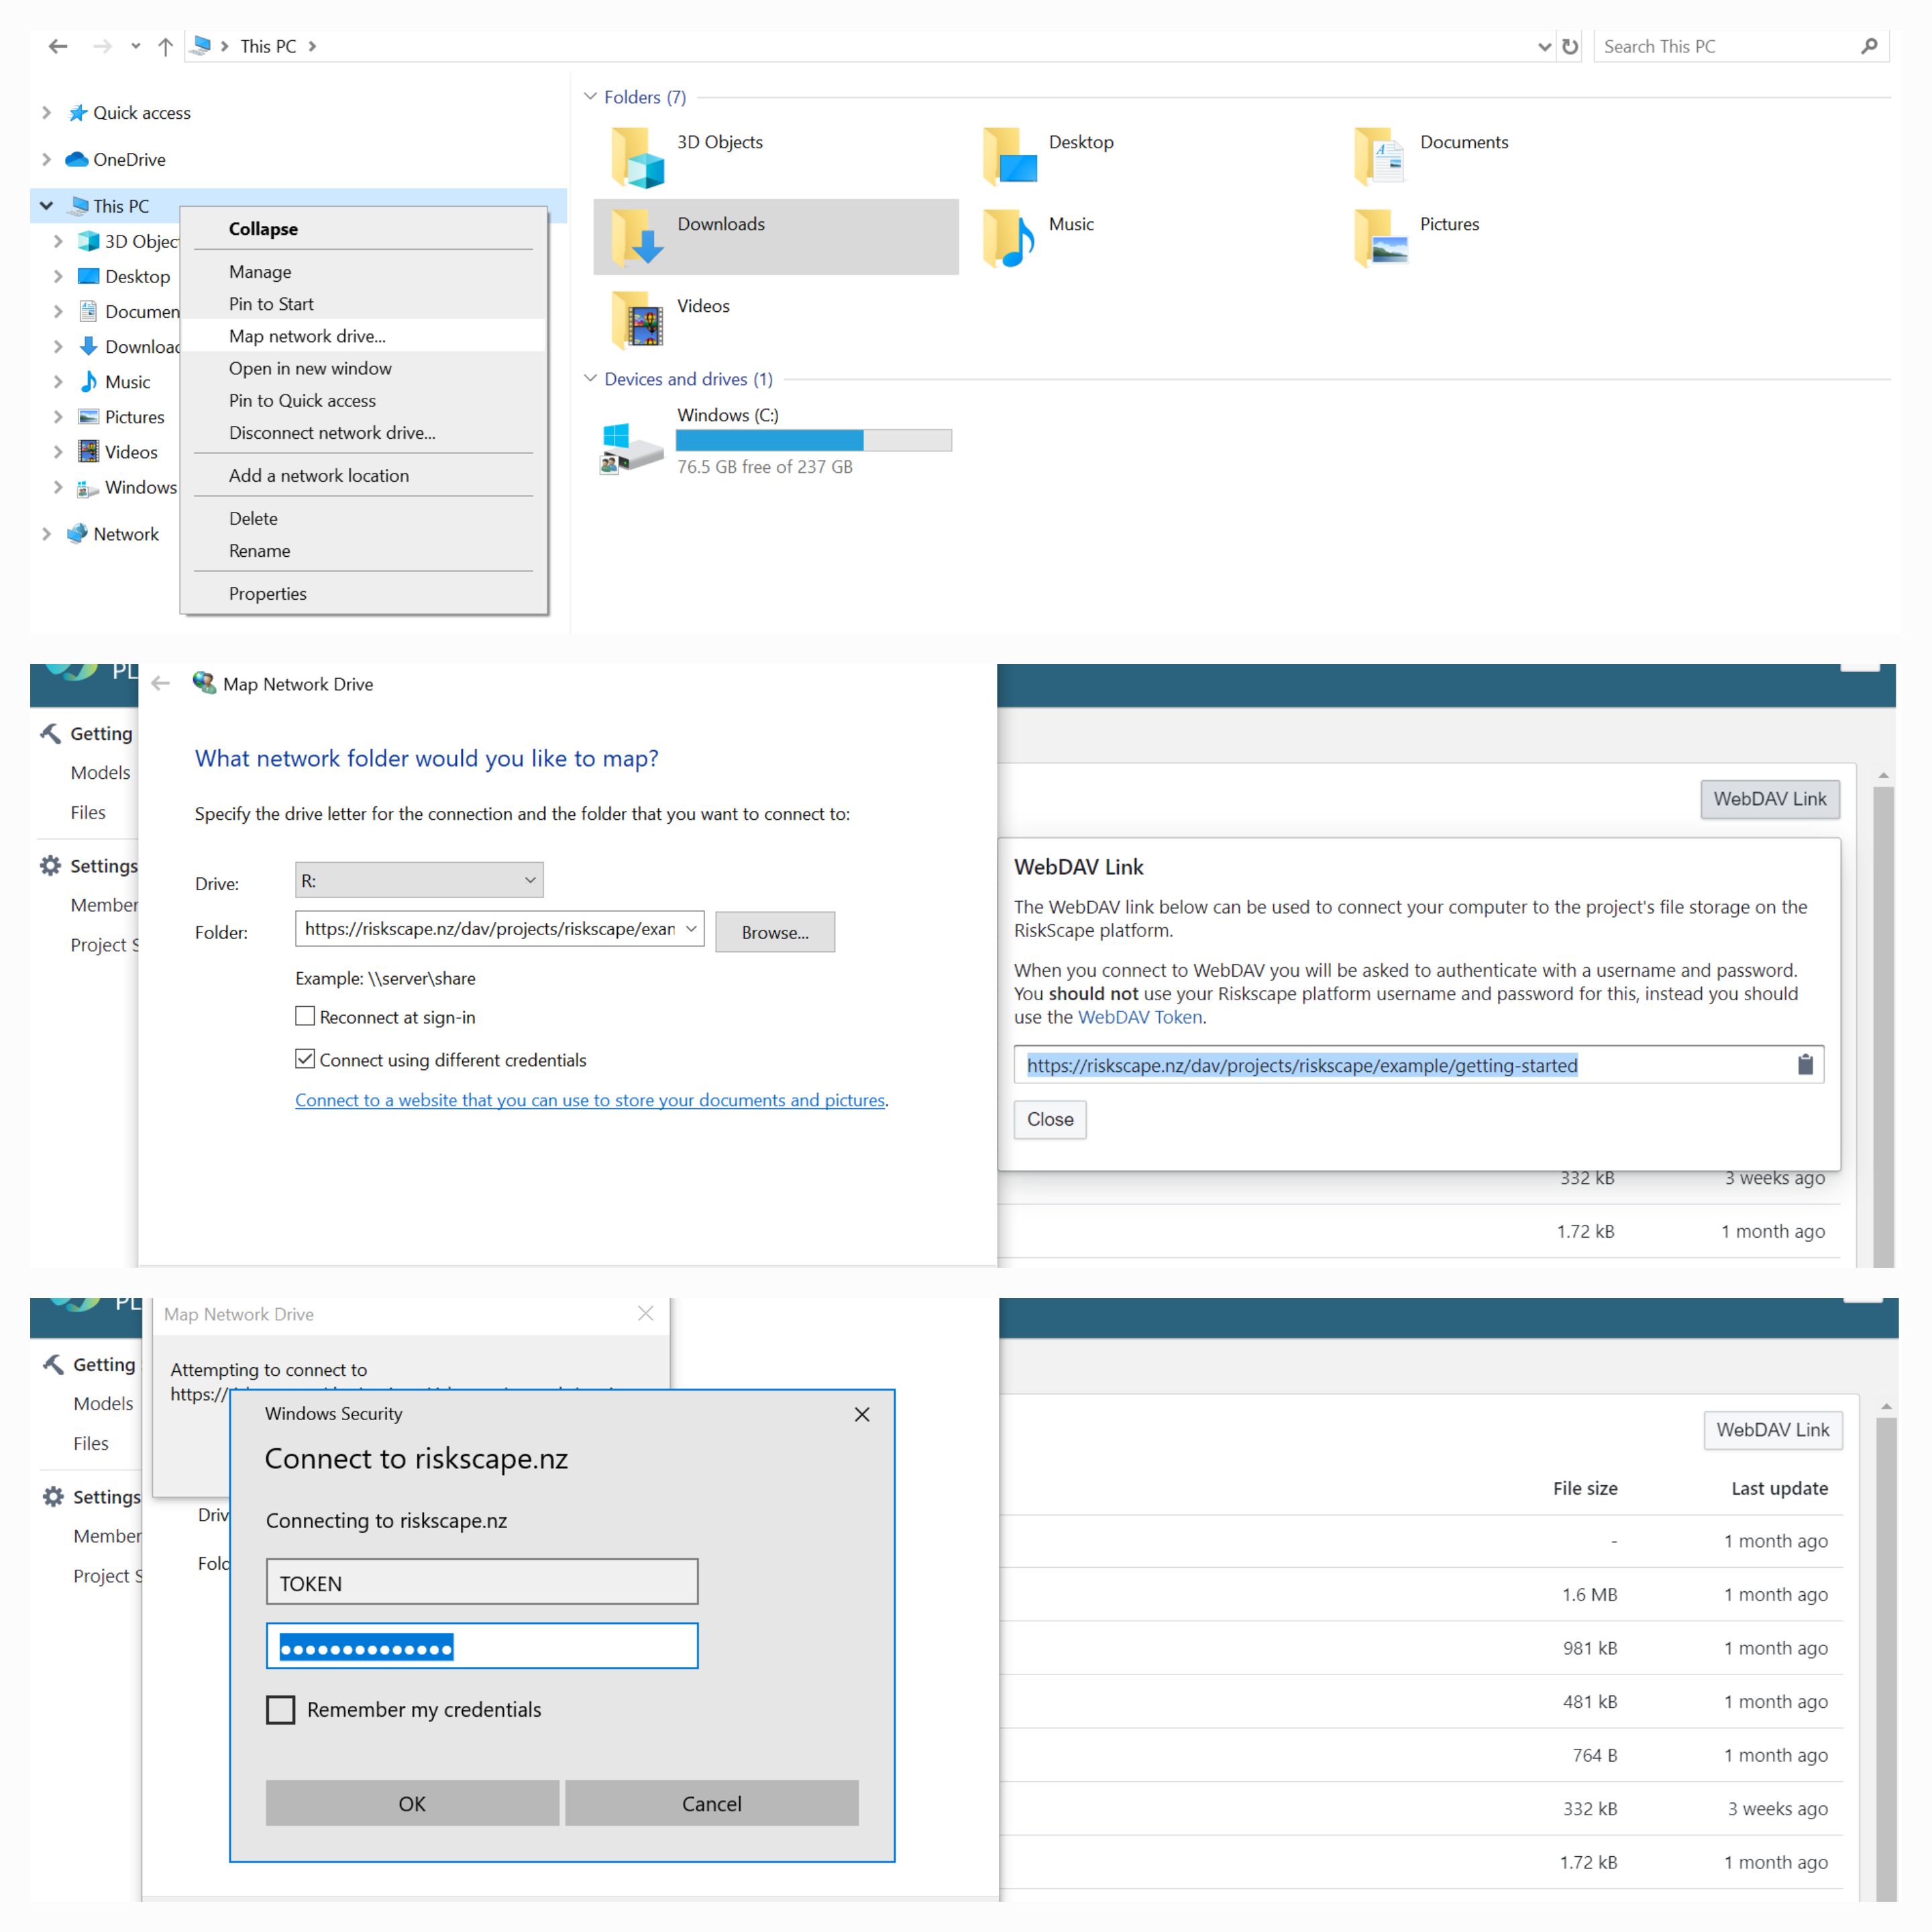
Next, you will use the file system explorer on your computer to connect to the RiskScape Platform via the WebDAV link. The specifics of this will vary depending on the operating system you are using. There are lots of resources available on the internet on how to do this, but here are a couple:
Windows: Accessing WebDAV with Windows. Note that you specify the
https://riskscape.nz/dav/projects/riskscape/example/getting-startedaddress for the Folder you want to connect to.
Note
When you setup the WebDAV connection, use TOKEN as the username
and the password is your WebDAV access token that you created earlier.
➡ Follow the appropriate instructions for your operating system to create the WebDAV connection. The following composite image shows the basic steps to setup a WebDAV connection on a Windows 10 computer.
If you have successfully setup the WebDAV connection, you should now be able to see the Getting Started project files in your file explorer. It should look something like this:
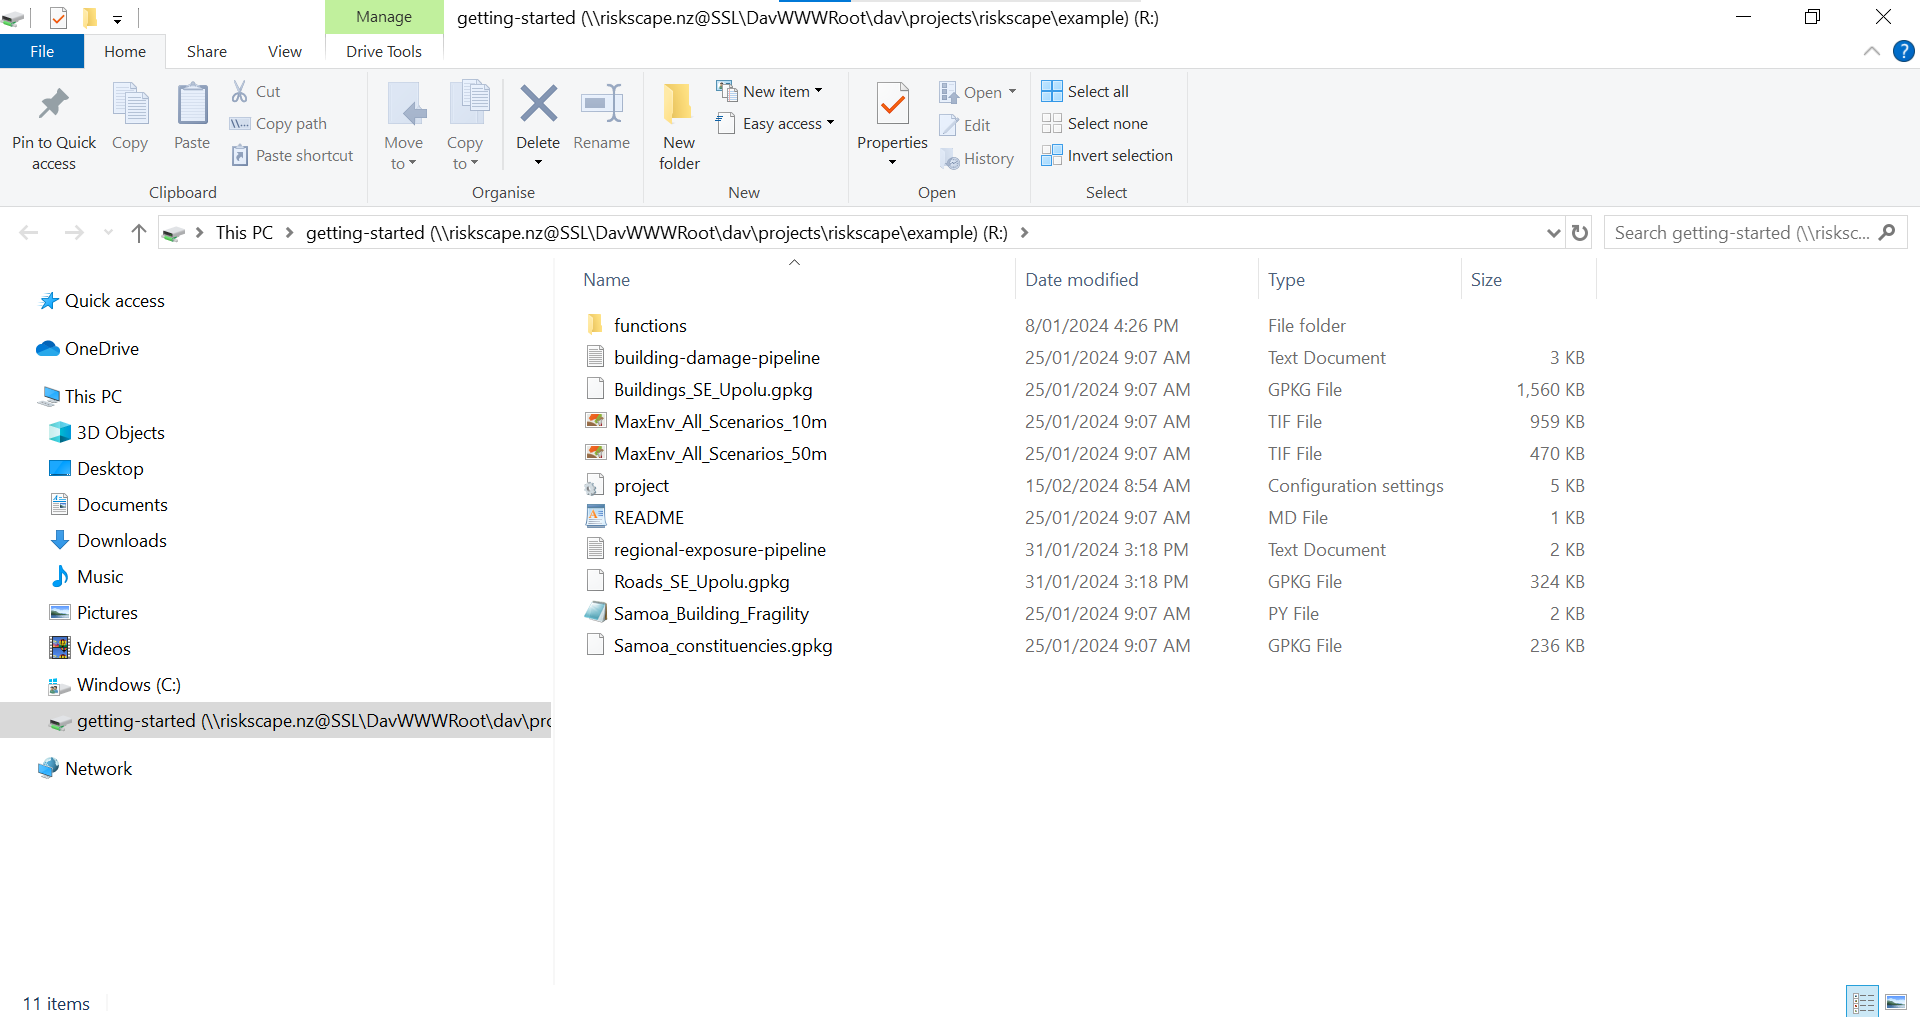
➡ In your file explorer, try opening the README.md file in a text editor.
You should be able to see the same content that you saw earlier when you were using your web browser.
Tip
Project admins are able to edit the project files via WebDAV. This means people can still use their favourite text editor to develop risk models in the RiskScape Platform. Remember that you can view the File History in your web browser if you make a mistake.
Accessing personal storage
You can also use WebDAV to access and manage files in your personal storage. To do this, you would use a WebDAV URL like this:
https://riskscape.nz/dav/users/YOUR_ORG/YOUR_USERNAME
Replace YOUR_ORG with the name of the organization you belong to in the RiskScape Platform,
and replace YOUR_USERNAME with your RiskScape Platform username.
For example, if your username is ronnie and you belong to the riskscape organization in
the Platform, then the WebDAV link for your personal storage would be:
https://riskscape.nz/dav/users/riskscape/ronnie
To connect, you can use the same WebDAV access token that you used earlier.
Further reading
There is another tutorial for Advanced CLI users that shows you how to use WebDAV to copy the project files and the run the models locally using the open-source RiskScape Engine CLI.